Two-Page Scrapbook Layout Ideas for Game Nights & Theme Parks
Scrapbooking with Indoor Play | Creative Memories Project Recipe Tutorial
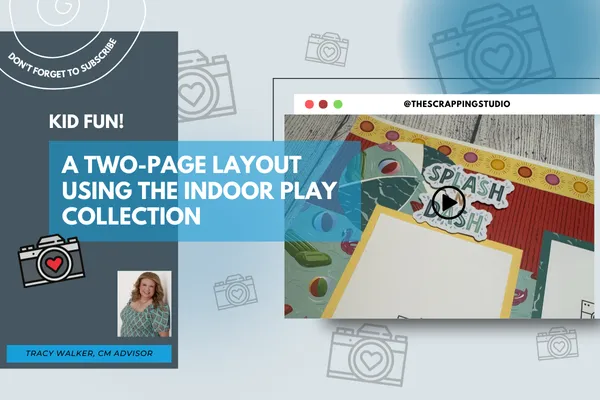
When it comes to preserving memories, sometimes the most ordinary moments—like a rainy-day game night or a fun afternoon at the arcade—become the ones we treasure most. That’s why I’m so excited to share this week’s Sketch Sunday project: Creative Memories Project Recipe #8 using the Indoor Play collection.
This bright, playful collection is full of bold colors, game-inspired patterns, and versatile borders that are perfect for documenting theme parks, arcades, carnivals, or family board game nights.
Watch the tutorial here
Why Project Recipes Make Scrapbooking Easier
If you’ve ever felt stuck staring at a blank page, project recipes are your best friend. Each recipe gives you a sketch, cutting guide, and layout inspiration. The beauty is—you don’t have to follow it exactly. You can adapt the sketch to fit your photos, papers, and story.
For Project Recipe #8, the original design called for a border punch. Instead, I swapped in border strips from the Indoor Play collection, giving the layout a bold, graphic look without extra tools. This flexibility is what makes project recipes so fun and approachable, whether you’re a beginner scrapbooker or a seasoned pro.
What You’ll Need
Here’s what I used for this two-page spread:
Indoor Play Designer Paper Pack
Indoor Play Border Strips & Mats
Bright White Cardstock (base pages)
Trimmer, Circle Cutting System, and Adhesives
Optional: If you want extra dimension, foam squares make the embellishments pop!
Step-by-Step Tutorial Highlights
Choose Your Base
I started with bright white cardstock to let the bold colors of Indoor Play really shine.Adapt the Sketch
Instead of punching borders, I cut strips from the Indoor Play borders. This is a great way to save time and stretch your supplies.Layer Your Papers
Black cardstock was used for mats, red designer paper for circles, and other patterned papers for background blocks. The layering creates contrast and keeps the layout lively.Cut with Purpose
When cutting patterned paper, think about direction. I aligned designs so they flowed across the page, making the layout feel cohesive.Assemble the Spread
Once everything was cut, I positioned the borders, circles, and mats on each page before adhering. This “dry fit” helps you see the overall design before committing with adhesive.
Ideas for Photos to Use with This Layout
This layout is incredibly versatile! Here are some ideas for when it works best:
📸 Family game nights with Uno, Monopoly, Sorry!, or Canasta
🎡 Theme park adventures—from roller coasters to arcade games
🎲 Rainy-day playtime at home with kids or grandkids
🕹️ Carnival and arcade fun—ski ball, prizes, and popcorn
🏠 Cozy family time that deserves a place in your scrapbook
It’s proof that you don’t need themed paper to tell a themed story—creative patterns and colors can do the job beautifully.
Finished Layout
The end result is a cheerful, two-page scrapbook spread that highlights the joy of play. Whether you’re documenting a big vacation or a simple night in, the Indoor Play collection makes your photos pop and your memories shine.
Watch the Tutorial
Want to see the process step by step? 🎥
👉Watch the full tutorial on YouTube
In the video, I walk through the cutting guide, assembly, and some little tips for adapting sketches to your personal style.
Let’s Scrapbook Together
I’d love to hear how you’d use this layout! Would you scrapbook a theme park trip? A family game night? Or maybe a rainy day stuck inside? Drop your ideas in the comments below—I love seeing your creativity.
💛 And if you’re looking for more scrapbooking inspiration, tutorials, and community—be sure to subscribe to my YouTube channel, follow me on Facebook and Instagram, and check out my upcoming scrapbook events.
Together, let’s keep turning photos into stories worth sharing.
